Add a Drop Down Box to the Ticket Page
- Expand Administration and click Ticketing.
- From the Select a Project drop down, click the ticket project to modify.
- Click the Ticket Fields tab.
- Click the Add DropDown button.

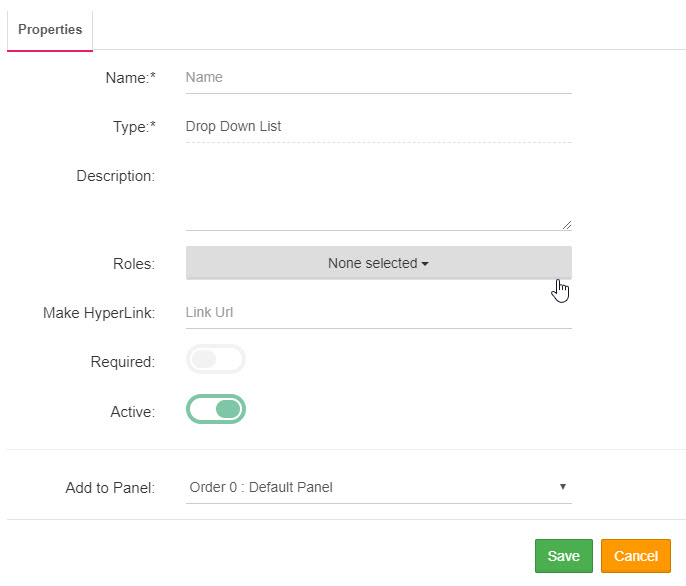
- In the Name field, enter the name to display for the drop down field.

- Optionally, enter a description for the drop down in the Description field.
- From the Roles drop down, select the roles that have access and visibility to the drop down on the ticket page.
- Optionally, in the Make Hyperlink field, enter the URL for which to link the drop down field.
- If this field is a required field on the ticket page, select the Required slider.
- The Active slider is selected by default.
- If more than one panel exist on the ticket age, select the panel where to place the check box from the Add to Panel drop down.
- Click Save.
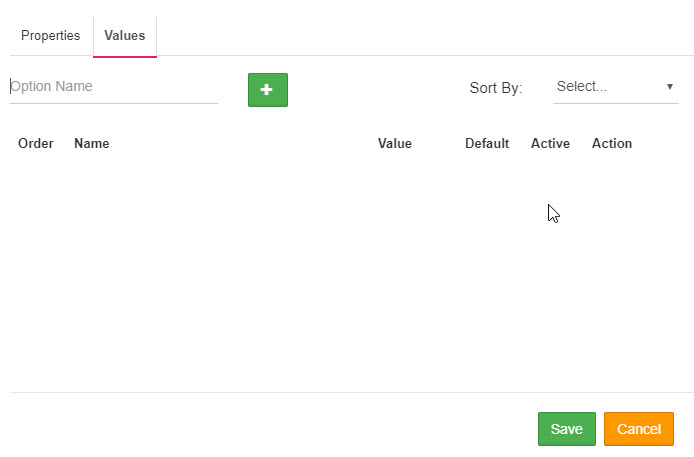
- Click the Values tab.

- In the Option Name field, enter the value to display in the drop down and click the Plus sign.
- To sort the drop down values by name or value on the ticket page, click the Sort By drop down and select Name or Value.
- Once all the values have been entered, select the Active check box of each to display them in the drop down on the ticket page.
- If one of the values is to be chosen by default on the ticket page, select its appropriate Default check box.
- If no sorting is chosen, drag and drop the values to the location order you wish them to appear in on the ticket page.
- To delete a value, click the Delete button.
- Click Save and close the box when finished.
The page you are trying to view has expired and is no longer available for viewing.